QAL MOCKUP TUTORIAL
First thing is to go to the QAL blog and get the color chart; this is not the .pdf version.
Right click on the page and then click "save image as." Another box will pop up asking you to choose a file to put it in. I put mine in a new folder marked QAL Mockup so that I'd have it in one place as I added new blocks.
See mine here:
Now for the fun part: getting those pictures added. Once you figure it out, its like riding a bike. First, the pics must be resized. Open your Paint program (btw, every computer has a Paint program. Find yours by going to the Start menu--its the little globe in the lower left corner of your computer screen--and click "All Programs." Scroll down until you see the folder called "Accessories." Click that open and scroll down again until you see it--trust me, its there. Pin the Paint program to the task bar by right clicking. This causes another box to come up and you can check "Pin to Task Bar.") Now, open up that Paint program and let's get started.
Click the dark blue button.
It will open a box like this:
Click the Open File here and bring up the pic of your first block. It will look like this in Paint:
Its big, I know, but click the Resize button; it opens a box that looks like this:
Be sure that the dot next to "pixels" is clicked and change the top number (horizontal) to 100. The vertical number will change respectively. Your once very large block now looks like this:
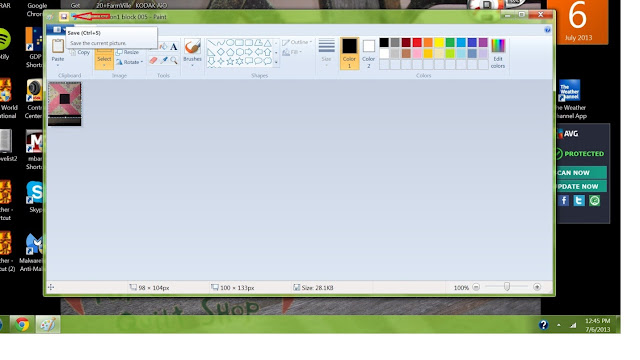
Now here's the fun part: Click the selection block little arrow and then click the rectangle selection. Next, move your cursor over your block from the upper left corner and drag to the lower right corner--like this:
A dotted line will be around your block. In the upper left corner of the Paint program, click the "File Save" button. A box will come up and crop your picture. You'll see that the dotted line is gone and now you can save this to your newly created QAL Mockup file.

Click the dark blue button in the upper left corner and hit "Save As." A list will come up like this:
Make sure you hit .jpg; it will make it easier to use your pic when placing it on your mockup. Now lets add these pics to the mockup!
Open your Paint program again and click the dark blue button in the upper left corner. Then open the folder and get the mockup from your saved file.
Click the box for the first block we made in the upper left corner and drag to the lower right; this will select the block we want to fill. Then click paste (upper left) and click the arrow like this:
Paste will open up a box so that you can find your newly cropped pic in your QAL Mockup file. You can position it to center or un-check the horizontal/vertical option to play with the dimensions so that it will fit properly.
Although it does seem a bit complicated, it really isn't. Just a bunch of clicking in the right places. (Or so Becca tells us!!)
* * * * *
Thanks, Becca for letting me post this. I hope those of you reading can use this.


No comments:
Post a Comment
Thanks so much for stopping by and leaving your comments! I love hearing what you have to say and I appreciate your taking the time to make your comments. Due to the amount of spam I've been receiving, please note that I will no longer be taking comments from "Anonymous." I'm so sorry for the inconvenience.